Image Processing - Part 1
- Luka Kozina
- Jan 4, 2022
- 2 min read

Updated: Jan 13, 2022
First few tutorials are going to be about Image Processing. Definition of IP would say it's a method to perform some operation on an image. Those operations can be resizing, rotating, blurring, cropping, filtering, changing colors... Python Pillow is a library that adds image processing capabilities to your Python interpreter. It's really simple and great for start, so I'll show You some main functions.
You can check github source or documentation. Installation of pillow library is simple.
python3 -m pip install --upgrade PillowWe'll start will importing libraries.
import PIL from PIL import Image
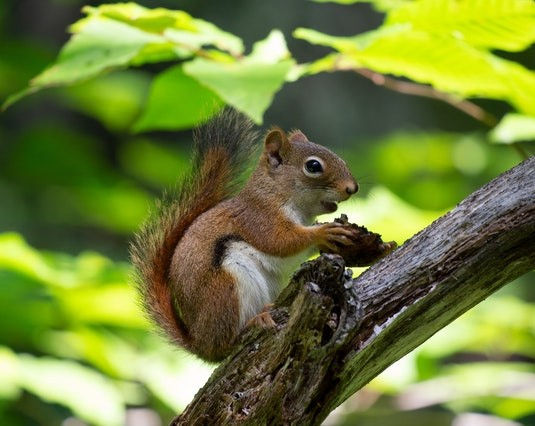
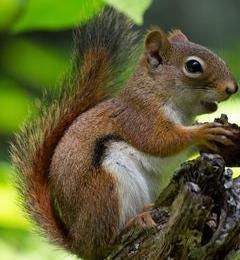
Next, we will use Image.open function and choose image we want to load. It's important that we provide correct path to the image. After that, we can see image by Image.show function.
img = Image.open("squirrel.jpg")
img.show()
We can check image parameters.
print(img.size) print(img.format) print(img.mode)
The result would be:
(535, 426)
JPEG
RGB
We can rotate the image.
img = img.rotate(90, PIL.Image.NEAREST, expand = 1)
We can transpose it (flip left and right).
img = img.transpose(method=Image.FLIP_LEFT_RIGHT)
Also, we can flip top and bottom.
img = img.transpose(method=Image.FLIP_TOP_BOTTOM)
Resizing can be done with Image.resize() function.
img = img.resize((300,300))
Image.split() method is used to split the image into individual bands. This method returns a tuple of individual image bands from an image.
r, g, b, = img.split() r.show() g.show() b.show()


Image.merge() Merge a set of single band images into a new multiband image.
img = Image.merge('RGB', (g, b, r))
And if you want to save some of processed images, there's a function Image.save().
img.save("new_img.jpg")
We saw that size of an image is (535,426). If we want to see just the part where the squirrel is, we can crop the image.
img = img.crop((120, 100, 360, 360))
This is all the code we used:
import PIL from PIL import Image # Location of the image img = Image.open(squirrel.jpg") #img = img.rotate(90, PIL.Image.NEAREST, expand = 1) #img = img.transpose(method=Image.FLIP_TOP_BOTTOM) #img = img.transpose(method=Image.FLIP_LEFT_RIGHT) #img = img.resize((300,300)) #r, g, b, = img.split() #r.show() #g.show() #b.show() #img = Image.merge('RGB', (g, b, r)) img = img.crop((120, 100, 360, 360)) img.save("new_img.jpg") img.show() print(img.size) print(img.format) print(img.mode)
Next, we are going to image use image filtering and text drawing , so we will start a new file and again import the libraries and load our image.
import PIL from PIL import Image, ImageFilter, ImageFont, ImageDraw
img = Image.open("squirrel.jpg")
Blurring the image can be done by Image.filter() function. There's also Gaussian blur, which is a widely used effect in graphics software, typically to reduce image noise and reduce detail.
img = img.filter(ImageFilter.BLUR) img = img.filter(ImageFilter.GaussianBlur(8))


We can also draw a text on an image.
font = ImageFont.truetype("FreeSansOblique.ttf", 35) draw = ImageDraw.Draw(img) draw.text((100, 70), "THIS IS SQUIRREL", font = font, fill=(0, 0, 255))

The whole code looks like this:
import PIL from PIL import Image, ImageFilter, ImageFont, ImageDraw img = Image.open("squirrel.jpg") #img = img.filter(ImageFilter.BLUR) #img = img.filter(ImageFilter.GaussianBlur(8)) font = ImageFont.truetype("FreeSansOblique.ttf", 35) draw = ImageDraw.Draw(img) draw.text((100, 70), "THIS IS SQUIRREL", font = font, fill=(0, 0, 255))
img.show()
You can find all the code here.
Comments